
Sunday, 31 January 2016
Saturday, 30 January 2016

HEALTH TIP
HEALTH TIP
The juice of carrot and tomatoes, mixed with little honey is good tonic for children.
The juice of carrot and tomatoes, mixed with little honey is good tonic for children.
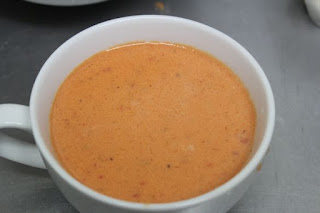
MICROWAVE MUG MOIN-MOIN.
MICROWAVE MUG MOIN-MOIN.
INGREDIENTS
Moin Moin batter
Vegetables(tomatoes,red paper,green pepper and green Vegetable)
Boiled Eggs (sliced)
Cooked Beef or chicken (sliced)
DIRECTIONS
1) Get all ingredients ready.
So, u have the batter mixed and ready
2) Pour batter into mugs
3) Add eggs, sliced Beef/chicken and vegetables
Note: You can also use any microwave safe bowl. Here i also used plastic containers which can be called microwave safe container.
4) Cover moin moin filled mug with a microwave safe lid/ towel , put in the microwave and initially cook on defrost setting using weight defrost at 20g for 3-4 minutes then switch to microwave setting for another 2 minutes. It takes about 5 minutes in total but depending on microwave model and size of mug cooking timer may slightly vary.
5) Microwave moin moin is ready.
Thank You All.


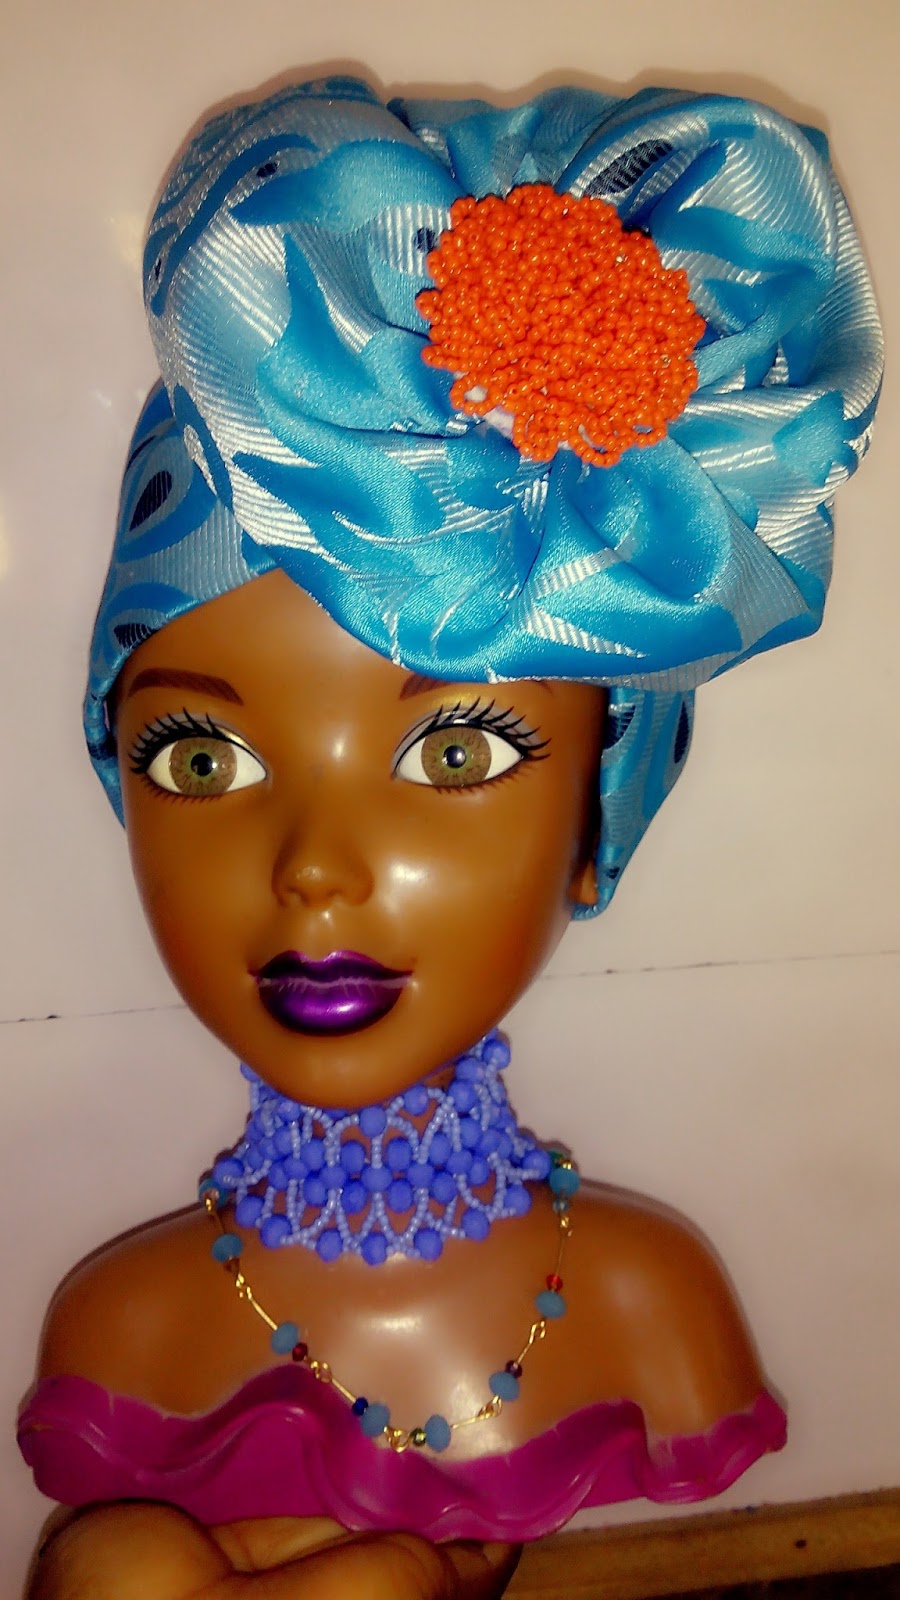
How To Tie Gele
Were you battling for hours with your headgear
today again….......
Step 1 – Take hold of your material at each end.
If you material is very long you can fold it over…
Step 2 – Next you will need to tie your hair if
you have long hair or made a long weave-on.
Although you should probably tie it all back
before getting hold of your material o!
Step 3 – Place your material at the very lower
back of you neck. While still holding each end of
the material.
Step 4 – While still holding the material, pull the
left end of the material forward to the front of
your head and place over to the right side of
your head, now do the same for the right hand
side of the material,placing it over to the left of
your head.
Step 5 – Keep hold of both ends of the material
and pull both ends to the back of your head.
Take both ends (tips) and tie them tightly
together,you can always double knot it, so it
wont slip off.
Step 6 – This step can be rather annoying and
provoking for beginners. Laughing! But don’t
worry, you will soon become an expert after your
first few times! Now that you have your gele tied
and properly fit on your head, you now have to
“shape it”. This can be done in different ways
depending on the style you like.
You will have to fold it well at the front and
make it balance well (big or small). Me like my
gele to be big and skentele o!. Thank me later,LOL.
BRAIDED NECKLACE.
BRAIDED NECKLACE.
MATERIALS NEEDED:
- Small Loop Gold Chain
- seed bead of choice colors
- Connectors
- 7mm Gold Jump Rings
- fishing line
- scissors
- round nose pliers
PROCEDURE:
Step 1: Cut six pieces of the fishing line, 12
inches in length . Take two pieces of the fishing line and double/triple knot at one end and attach to a jump ring, String seed beads until a length of around 10 inches for both strands.
- Knot and secure with another double cup
connector. Continue with the rest of the string so that you finish with 3 sets of double strands.
Step 2: Take the 3 sets of double beaded
strands and attach them to a jump ring using the double cup connector and secure . To begin braiding, keep the 3 sets of double beaded strands separated, and start braiding them together . (It may help to tape one end to a table for stability . ) Finish the braid by attaching another jump ring at the opposite end.
Step 3: Cut the gold chain to 20 inches in
length . Attach each end to the jump rings on either side of the braid .
there are many variations to the braided beads. Be creative!!
happy beading😜😜😜😜😜


Cubic Right angle weave (CRAW)
Cubic Right angle weave (CRAW)
Material: any size of bead. Ur fl to use will determine on the bead u are using
Procedure:
Step 1: Pick 4beads and cross with the 4th one
Step 2: With ur ryt thread, pick 3beads and cross with the 3rd one. Pass ur left thread into the next bead
Step 3: With ur ryt thread, pick 2beads and cross with the 2nd one. Pass ur left thread into the next bead
Step 4: With ur ryt thread, pick 2beads and cross with the 2nd bead. Pass ur left thread into the next 2beads.
Step 5: With ur ryt thread, pick 1bead and cross with it.
Now u will av ball of 12
Step 6: Continue repeating step step 2 to 5 till u get ur desired length.
Daily Skincare routine for an Oily Skin
Daily Skincare routine for an Oily Skin
I get to talk a lot about oily skin. May be because for years I suffered a lot as an oily- skinned person without knowing how to handle the excess oil. But really, it deserves a bit more attention than others because it's a problem- skin. It is prone to having a lot more skin challenges than other skin types.
First of all, I like to mention that , 'it's only the excess oil we should work on getting rid off, and NOT the entire oil'.
The oil naturally found in our body is responsible for the glow and elasticity of our skin. So don't tamper with it. Just get the excess off by doing the following;
1. You will need to find out what foods exactly contribute to excess oil in your skin and make you breakout. For some , it could be Groundnuts, Butter, Fried foods , Pastries. You will need to investigate and reduce intake of these foods. If you don't, the good result you get from your skincare products won't be permanent. You will just keep moving in a cycle .
2. cleanse twice daily with a cream cleanser ; this helps to get rid of the dirts that the excess oil has attracted and accumulated in your pores. If these dirts are not removed from the pores, you will keep breaking out with a lot of blemishes.
Its also very important you avoid an alcohol- based cleanser. Though this has been advised by some professionals to be the best option for oily skin, but I tell you it never gets the problem solved as your skin will keep replacing the too-much oil the alcohol is taking from your skin. Plus, using alcohol- based product daily can make the skin to age rather too quickly . So get the type that is alcohol-free.
3. You should use a scrub after a cleanser twice or thrice weekly. Pls avoid the eye areas as they are very delicate and do not need vigorous cleansing or exfoliation.
4. Twice daily, you need to use a toner after your cleanser to tighten your pores . An alcohol-free type is best. Witch-hazel is an ingredient to look out for in a toner
5. Use a mask twice or thrice weekly after scrubbing or after cleansing. Your mask should have egg- white or kaolin. This helps to remove the excess oil and also deep- cleanses the skin.
6. Moisturize twice daily with a water- based moisturizer. This prevents you from adding to the excess oil you have already. And will ensure you adequately benefit from the moisturizer. You should get the best of your moisturizer.
7. Wear sunscreen to protect your skin from UV rays. Am sure you won't want to add Sunburn and photo aging to the challenge you have already. I strongly advise SPF30. Over -exposure to Sunlight can also be responsible for the general skin darkening that most people complain about. N.B.; never use a lightening cream without a sunscreen
8. If you have pimples or acne , don't touch. Visit a Professional to help you with it. The ripe pimples can be extracted properly by a professional. This is important because when you touch it, you attack the pimples the wrong way and you will definitely have dark spots.
9. Develop and maintain healthy lifestyle. Everything about you must be clean always. Nothing dirty must touch your face.
10. Like I always say, True Skincare starts from the Inside, so eat the right foods.
Supplements help you give to your Body what your body needs but not getting from what you are eating.
RECIPE FOR BURNING TUMMY FAT.
RECIPE FOR BURNING TUMMY FAT.
Detect the one that works for you and you are not allergic to.
1) Lemon grass / Tea leaf ,Lemon,turmeric, garlic and ginger.
Boil your lemon grass, sieve and allow cool, blend lemon,turmeric, garlic and ginger together and pour inside d water. Put in a plastic bottle or glass jar and refrigerate , it lasted 5days. Then drink morning and night. It works wonder.
2) Lemon, honey, and ginger too works. Grate/ blend your fresh Lemon,ginger and (garlic if u can bear d smell) boil with little water, sieve and allow cool, then you put honey and juice your Lemon into it and drink. Pls note that if you av infection or menstrual disorder, your menstruation might comes d same day or next as it will flush it all out.
3) Also chewing of Scent leaf known as Efinrin or bitter leaf also works but u go Mess pass Jelili oniso.
4) Napa ginger and honey tea too, but juice grape into it to make it work faster.
5)Lemon juice in warm water too, every morning and night
Note pls:
All Nursing Mother's shouldn't take this until after winning period
But take Moringa leaf and honey instead, boil your Moringa leaf if u can't chew, allow cool and put honey.
Note that addind honey to a hot recipe makes it loose its potency, so add only when its cool.
When using all this recipe always measure yourself to know how much pounds of fat you've burn, especially when you don't av more than a courier travelling bag and a box of clothes like me. Or else, you will start sewing new clothes for your new Stature like Me ooooooo.
Good luck.
Rice water helps lighten the skin tone and help in balancing
Rice water helps lighten the skin tone and help in balancing
You can soak your rice inside water for 25mins, wash it very well and extract the water.
Use the water to rinse your body while taking your bath after using soap.
Another type is Per-boiled rice water: Boil your rice for some minutes, extract the water and use it to rinse your body. Don't add salt to your rice water.
You can keep your rice water in the fridge but don't store for more than 4days.
1cup of rice->2cups of water
2cups of rice->4cups of water, etc
TOMATOES TO CONTROL OILY FACE
TOMATOES TO CONTROL OILY FACE
1. Cut a tomato in half and rub it on your face. Allow the juice to soak into your skin for 15mins. Rinse with cold water, pat the skin dry and apply a light oil-free moisturizer.
2. You can also make a face mask by combining 3tsps of tomato juice with 1tsp of honey.
1. Cut a tomato in half and rub it on your face. Allow the juice to soak into your skin for 15mins. Rinse with cold water, pat the skin dry and apply a light oil-free moisturizer.
2. You can also make a face mask by combining 3tsps of tomato juice with 1tsp of honey.
TREATMENT FOR PIMPLES
TREATMENT FOR PIMPLES
1. Add 2tsps of baking soda, 1tsp of honey, 1ball of lime and 1tsp of milk. Mix together to form a paste and apply to the face or the affected area. Keep doing this remedy 3times a week till the pimples get cleared
2. Whenever you want to steam, first rub pineapple juice on your face, then follow the steaming process.
HOW TO MAKE RAW TURMERIC TO POWDER FORM
HOW TO MAKE RAW TURMERIC TO POWDER FORM
1. Wash your raw turmeric.
2. Scrap its skin.
3. Put in a cooking pot.
4. Cover it with water like you want to cook yam.
5. Leave it to boil for 40mins.
6. When it becomes tender, drain and dry it on a paper in room temperature. 7. When it dries completely, grind it to powder form.
1. Wash your raw turmeric.
2. Scrap its skin.
3. Put in a cooking pot.
4. Cover it with water like you want to cook yam.
5. Leave it to boil for 40mins.
6. When it becomes tender, drain and dry it on a paper in room temperature. 7. When it dries completely, grind it to powder form.
How to Make Natural Concealer
How to Make Natural Concealer:
2 teaspoons of argan oil or jajoba oil
1 teaspoon of shea butter
1/2 tsp emulsifying wax
1 tablespoon aloe gel
1 teaspoon witch hazel
2 Tablespoons non-nano zinc oxide
1/4-1/2 tsp cocoa powder
1/2 tsp clay of choice (if using
Instructions
1. Mix all ingredients to get desired color
and coverage.
2. Zinc oxide will give coverage and matte
finish.
3. Colored mica powders, natural clays
and cocoa powder will give color. Start
slowly and add as needed, testing on
inner-arm as you go to find your shade.
4. Store in a small glass jar with a lid.
Note: If you prefer, just arrowroot powder (or
white cosmetic clay), cocoa powder, and
(optional) cinnamon powder can be used. This
will create a great and completely natural/
edible foundation but it will not stay as long
as a powder containing zinc oxide and mica. I
personally feel safe using zinc oxide(non nano and uncoated) but if you don’t,
- just stick to the arrowroot version.
How to Grow Longer Eyelashes
How to Grow Longer Eyelashes
Naturally:
1. Castor Oil
I think using castor oil has worked wonders for
helping to grow my eyelashes! Castor oil is used
not only for increasing growth of eyelashes, but
also for growing your hair and for eyebrows too!
It contains beneficial antibacterial and anti-
inflammatory properties, which in combination
with a rich source of nutrients aids in
encouraging hair growth.
How To Use It:
Make sure to use a natural and hexane-free
brand of castor oil (I use this one). To use it, just
wash your eye area until it is clean of any
makeup or products. Then, use either your finger
or a cotton swab to lightly apply the castor oil
from the roots of the eyelashes to the ends of
the lashes. You only need a drop or two to cover
the lashes for each eye, a little goes a long way.
Apply the castor oil at least a few times a week
How to Remove Dark Spots From Your Face How to Get Rid of Brown Spots on Face Sunburn
How to Remove Dark Spots From Your Face How to Get Rid of Brown Spots on Face
Sunburn
Sunburn is a common issue when dealing with excessive sun exposure. Sunburn means that the UV rays from the sun have damaged your skin to the point of burning, and the result can be tenderness, dryness, and peeling. Other effects are blisters, redness, nausea, and fatigue. If you experience sunburn, there are several different home treatments. If you have cucumber handy, stick one in the fridge to chill it, then slice it up and place the slices on your burns. Alternately, you can juice the cucumber and apply the juice via cotton balls to your face. In a similar way, chilled watermelon slices have cooling effects on the skin and can be applied to sunburn as well.
Mix up a paste to apply to your face made of calamine powder and either rosewater or cucumber juice. Apply liberally to your face and let it set for a few minutes before washing off. Sandalwood powder paste can be used as well, if you mix the powder with rosewater, watermelon juice, or cucumber juice. Olive oil and vinegar combined can work to treat sunburn. Put this mixture on your face a few hours prior to bath time for best results. Buttermilk can be used on the skin as a soothing agent. Whip up a batch of ice cubes made from watermelon juice, cucumber juice, or rosewater and place it in a cloth to press on your face to help heal sunburn.
DIY Natural Skin Lightening Cream
DIY Natural Skin Lightening Cream
There is serious rave amongst black women to become fairer in complexion and cosmetic markets in Africa are flooded with all sorts of skin lightening creams, gels, and lotions to meet these demands. Most of these lightening products contains chemicals such as hydroquinone and steroids which might be hazardous to our health. Some of the good ones can also be extremely expensive. To save some cash and ensure you are using a safe product, make this skin-lightening cream at home with inexpensive ingredients from your kitchen.
Things You'll Need
1 ½ cups plain organic yogurt
3 or 4 almonds
2 tbsp. lemon/lime juice
1 tsp. honey
Pinch of ground turmeric
Crush the almonds to powder in a food processor. Be careful not to process for too long or it will turn into almond butter. If you don't have a food processor, you can find pre-crushed almonds at most grocery stores sold as "almond flour" or "almond meal."
Combine the almond powder with the yogurt, lemon juice, honey and turmeric. Stir until blended thoroughly.
Apply a small amount of skin-lightening cream every night before bed. Do not apply during the day. Lemon/Lime juice can react negatively to sun exposure. Also, when skin-lightening cream is used at night, its skin tone-enhancing powers are increased. At night, skin goes through a recovery cycle in which hormones are released that increase blood circulation and open pores. This process makes it easier for skin creams to penetrate and be absorbed.
Expect to see results in 14 days. Almonds, lemon juice and turmeric are some of the most powerful natural skin lightening ingredients in the world. They can produce results equal to many chemical skin-lightening creams. They've been used for centuries for their natural bleaching and brightening properties. When you combine these ingredients with the nourishing and moisturizing properties of yogurt and honey, the end result is a luxuriously rich skin cream that not only will lighten skin color, but also will improve the overall health and condition of your skin.
Store the cream in a tightly closed jar in the refrigerator and ensure you use within seven days. Make small batches of this cream at a time to prevent contamination.
Until next post...remain beautiful


Monday, 25 January 2016
Full Moon Design
Full Moon Design
cut a reasonable lenght of fl,drop 12sb(I used size3sb)and cross with d ball,pick anoda11sb and cross with 1sb.u will have 22sb altogether.u then pass ur needle round the sb and knot,pass u needle into 1sb and pick 10sb and pass ur needle from back and pass into 2sb,then pick anoda 10sb and pass ur needle into where ur needle came out from back and a new sb.continue till u go round and knot.
cut a reasonable lenght of fl,drop 12sb(I used size3sb)and cross with d ball,pick anoda11sb and cross with 1sb.u will have 22sb altogether.u then pass ur needle round the sb and knot,pass u needle into 1sb and pick 10sb and pass ur needle from back and pass into 2sb,then pick anoda 10sb and pass ur needle into where ur needle came out from back and a new sb.continue till u go round and knot.
Sunday, 24 January 2016


Queen Mother Design
PROCEDURE OF QUEEN MOTHER DESIGN
materials needed: sand bead size 2 or 3, crystal bead size 8 or 10, 0.35mm fl, bead needle.
Step 1: start matting(mat spread) with the sand bead, mat to a length of 32, then reverse back to the starting, if u can't reverse just tie ur fishing line and cut when u get to length 32 then u expand the matting to 2 lines by joining.
Step 2: join both sides of the matting by: cutting a new fishing line, put one sand bead in the middle, pass ur left side fl tru the first sand bead by the left of the matting and ur right side fl tru the 1st sb by d right of the matting then cross with one, continue taking one by left one by right and cross with one, continue till U reach d end of ur matting, tie ur work and cut off extra fishing line.
Step 3: repeat step 1 and 2 and drop.
Step 4: repeat step 1 and 2 again but let d length of ur matting be 16 this time, that's 32 divided by 2=16, each one u are doing will be 2 so repeat d one of 16 two times and drop.
Step 5: repeat step 1 and 2 again but let d length of ur matting be 8 this time, that's 16 divided by 2=8; do d 8 two times and drop, continue dividing dem by 2 until u get to length one, and make sure u have two of all d lengths U made on ur table. Wen U have made all d lengths needed ( length 32; 16; 8; 4; 2; and 1)

Brightening Toner
Quick one
Brightening toner
1.Fill ur bottle 3/4 full with d Witch Hazel
2. Fill the last 1/4 with the Lemon Juice
3. Shake it
4. Wipe over clean face with cotton ball/pad in place of toner.
– significantly helps and controls acne flare ups
– oily skin reduced
– lightening of acne scars!
– helps with pigmentation.
– Shake it up each time before using, as the lemon settles

Thursday, 21 January 2016
Wednesday, 20 January 2016
Just For U All, Free From KLM. Happy Beading.
• 1RUSSSIAN SPIRAL
MATERIALS NEEDED:
1. Size 1 sand bead (sb)
2. Size 6 crystal bead (cb)
3. 0.30mm fishing line (fl)
4. Beading needle
PROCEDURE
▷ Pick 1sb and 1cb three times and form a ring
▷ Exit fl from a sb and pick up1cb and 5sb and stitch through the next sb
▷ Repeat previous step
TO STEP UP
▷ Pick 1cb and 5sb and stitch through the first sb after cb in step 2
▷ Continue till you get desired length.
2. FOUR WAY SPIRAL
MATERIALS NEEDED:
▷ Size 6 crystal bead (cb)
▷ Size 2 sand bead (sb)
▷ 0.35 fishing line (fl)
▷ Beading neddle
PROCEDURE
▷ Cut a comfortable length of FL into four equal sizes
▷ Insert a single stopper at the end of all the four FL
▷ Insert 7SB into each of the FL
▷ Divide the FL into two groups making it two groups
▷ Pick up the first group and cross with 1CB
▷ Repeat previous step for the other group
▷ Pick a line from each of the group and join them side by side to form another group of FL
▷ Pick one group of the FL and Insert 4SB on the FL (left line)
▷ Insert 1CB on the right line and cross the line with 1SB
▷ Repeat two previous steps to the other group
▷ Continue to get desired length
▷ To round up repeat step 3 and insert stopper and hook
3. FLOWER ON SPIRAL ROPE
▷ Insert needle into previous spiral work and pick 4sb, 1cb6 and 1sb
▷ Skip the last sb and pass needle under the cb6, 4sb and back into the previous spiral rope beads
▷ Then pass needle into the next sb on the spiral rope
4. LEAFY DESIGN
MATERIALS NEEDED:
▷ Crystal bead size 6&8 (CB6&CB8)
▷ Size 50 fishing line (FL)
PROCEDURE
▷ Insert 2CB8 and 2CB6 on the right, 2CB6 on the left and interlock with 2CB8
▷ Put 2CB6 on the left, another 2 on the right then interlock with 2CB8
▷ Continue until you get desired length
TO TURN:
▷ Insert 2CB6 and 2CB8 on your left, cross with 2CB6
▷ Insert 2CB8 and 2CB6 on the left FL then cross with 2CB8
▷ Pass the right FL into the previous 2CB6 by the side and insert 2CB6 on the left FL and cross with 2CB8
▷ Continue previous step till you get till the end and turn again (3 steps)
5. BRIDE BRACELET
MATERIALS NEEDED
▷ Size 2 sand bead (sb)
▷ Crystal bead size 8(CB8)
PROCEDURE
▷ Insert hook and stopper to FL after dividing into 2sides (left and right)
▷ Insert 10SB to each sides and cross both side with 1CB
▷ Insert 10SB to each sides and insert 2SB
▷ Insert 10SB and cross with 1CB
▷ Repeat 2-3 to get desired length
6. BEADED ROSE
MATERIALS NEEDED
▷ Crystal bead size6(cb)
▷ Size 2 sand beads (sb)
▷ 0.40Fishingline
▷ Beading needle
PROCEDURE
▷ Insert 8cb and tie to form a ring
▷ Pass needle into immediate bead after knot and insert 1sb, 1cb, 3sb, 1cb and 1sb into that same crystal you passed your needle into
▷ Insert8sb and pass needle into the 3sb in the previous step
▷ Pass another 8sb and pass needle into the bead in step 2
▷ Pass needle into the next crystal and repeat step 3-4
7. FLAT SPIRAL
MATERIALS NEEDED:
▷ 0.35 fishing line
▷ Crystal bead size 4 and 6
▷ Size 2 sand bead
▷ Beading needle
PROCEDURE
▷ Pick up 2cb6, 7sb, 1cb4 and 7sb and sew back through the 2size6 in the same direction. Push the loop of the sb and cb4 to the right of the two cb6
▷ Pick 7sb, 1cb4 and 7sb and sew through the last cb6 and push to the left of the 2cb6
▷ Pick up 1cb6, 7sb, 1cb4 and 7sb and sew through the last next cb6 in the previous step and the new one just added and push new loop to the right
▷ Repeat procedure to get desired length.
8. 30 BEADED BALL PROCEDURES
(Any size of bead. 0.40 or 0.50 fishing line)
PROCEDURE
NOTE: pass with right hand and pick beads with left
▷ Pick 4 and cross with 1
▷ Pick 3 and cross with 1 and pass fl to the next bead
▷ Pick 2 and cross with 1 and pass into next bead
▷ Pick 2 and cross with 1 and pass into next bead
▷ Pick 2 and cross with 1 and pass into next bead
▷ Pick 1 and cross with 1 and pass to the next bead
▷ Pick 2 and cross with 1 and pass into next 2 beads
▷ Pick 1 and cross with 1 and pass into next 2 beads
▷ Pick 1 and cross with 1 and pass into next 2 beads
▷ Pick 1 and cross with 1 and pass into next 3 beads
▷ Cross both lines with 1 beads and tie
9. PICOT CORN
MATERIALS NEEDED:
▷ 0.35 fishingline
▷ Size 2 sand bead
▷ Crystal bead size 6
▷ Beading needle
PROCEDURE
▷ Insert 6sb and tie to form a ring and enter into the sb next to the knot
▷ Pick a sb and skip the next sb to the one you entered on the ring and enter the next sb
▷ Repeat previous step until you get the desired length e.g 18inches
▷ (to close) move the needle round the sb at the top of a couple of times to close the circle
▷ Insert the needle into the sb on the next line to the left
▷ Pick 5sb and enter the sb up on the next line
▷ Repeat previous step for the quarter of the work
▷ To continue, follow the same movement but pick a crystal bead and a sb, insert the needle back into the cb then climb
▷ Repeat previous step for half of the entire length and repeat previous method to finish the remaining quarter.
10. FLATRON DESIGN
MATERIAL NEEDED:
▷ 0.35 fishing line
▷ Beading needle
▷ Crystal bead size 8
▷ Sand bead size 2
PROCEDURE
▷ Cut a long fl and string 4sb on the left side, 1 cb on the right and cross with 1 sb
▷ String 4sb on the right side and 1cb on the left and cross with 1sb
▷ Continue step 1-2 to get desired length
STAGE 2
▷ Cut a fresh fl, pass the left side fl through the first cb of stage 1
▷ String 4sb on the left side and pass it through the third cb of stage 1
▷ With right hand, string 1 cb and 4sb and cross with 1sb
▷ With left string 4sb and skip the next cb and pass through the next one
▷ With the right side, sting 1cb, 4sb and cross with 1sb
▷ Repeat stage 2 till you get to the end of stage 1
STAGE 3
▷
▷ Cut another fl and repeat stage 2 till you get to the end
▷ Starting like stage 2 but instead of 4sb, it will decrease to 3sb
NOTE: the more step, the lesser he sb will be
11. DOUBLE SPIRAL ROPE
MATERIALS NEEDED:
▷ 0.30 fishing line
▷ Beading needle
▷ Sand bead size 2
▷ Crystal beads size 4
PROCEDURE
▷ On a comfortable beading thread, pick up 4cb4 and 7sb then stitch back through the 4cb4 and pull tightly to make them fall side by side
▷ Pick up 1cb4 and 7sb, stitch up through 3cb4 and the new one added and pull
▷ Continue by picking 1cb4 and 7sb and stitch up through t3cb4 existing and new one added till you get desired length.
12. CRYSTAL SPIRAL 1
MATERIALS NEEDED:
▷ Crystal bead size 6
▷ Sand bead size 6
▷ Beading needle
▷ 0.30fishingline
PROCEDURE
▷ String 1cb, 3sb, 1cb, 3sb and icb and pass fl into the cb to form a ring
▷ String 3sb and 1cb and pass fl into the next cb
▷ Continue inserting 3sb and 1cb to get desired length
NOTE: there will be 2cb beside each other, always pass needle into the first cb
13. FISH BONE
MATERIALS NEEDED:
▷ 0.35 fishing line
▷ Size 2 sand bead
▷ Beading needle
▷ Crystal bead size 4
PROCEDURE
▷ Add stop bead
▷ Drop 6sb and pass fl through the middle 3sb upwardly ( 2 sb fall to the side)
▷ Drop 1sband pass fl from above through the 4sb i.e using the one used as stop bead
▷ Drop 1cb and pass fl through the 2sb on the other side
▷ Now, drop 4sb to make 6sb on the cb and repeat all steps to get desired length
STEP 2
▷ Pick a new fl and tie
▷ Repeat steps 1-3 in step 1
▷ Then pass fl through the first cb on completed step 1 and through the 2 sb on the other side
▷ Drop 4sb and repeat procedure
14. MODIFIED ABUJA CONNECTION
MATERIALS NEEDED:
▷ Size 2 sand bead
▷ Crystal bead size 8
▷ 0.35 fishing line
▷ Beading needle
PROCEDURE
▷ Insert I cb and slide to the middle, add 5sb each to left and right sides and cross with cb
▷ Continue till you get desired length
PHASE2
▷ Cut a new fl and insert it into the first cb added in step 1
▷ Add 5sb to the left fl and add 1cb, 5sb and 1cb to the right fl
▷ Then insert the right fl into the second crystal in step1
NOTE: Continue phase 2 to get desired width, you will continue by adding 1 bead to new step just like the conventional design.
15. BUSH DESIGN
MATERIAL NEEDED:
▷ Size 2 sand bead
▷ Beading needle
▷ 0.35 fishing line
▷ Gold ball accessory
PROCEDURE
▷ Cut 6 pieces of fl and add stopper at the tip
▷ Pick 1 out of the fishing lines
▷ Insert 7sb and pass the fl back into the first sb
▷ Insert another 7sb and pass through the first sb again
▷ Continue the procedure 10times
▷ Repeat the same for the other fishing lines.
▷ Insert a gold ball
▷ Start procedure again
▷ Continue till you get desired length.
16. BRIDAL CODE
MATERIAL NEEDED:
▷ Crystal size 6
▷ Size 2 sand bead
▷ 0.35 fishing line
PROCEDURE
▷ Pick 1cb, 2sb, 1cb and 4sb, then pass fl through the third sb
▷ Pull and pick 2sb, 1 cb, 2 sb and pass needle through initial cb and tie
▷ Pick 4sb, go through the third sb and pick 2 sb, 1cb, 2sb and pass fl through the third cb in step 1
▷ Pick 4sb, go through the third sb, pick 2sb, 1 cb
▷ Continue till you get desired length
PHASE 2
▷ From 4sb, pass fl into the bottom of first cb at the top of the work
▷ Bring it out from the top and pick 5sb and go through the bottom of the next cb.
17. TUBIC DESIGN
MATERIALS NEEDED:
▷ Size 2 sand bead
▷ Crystal bead size 4
▷ 0.30 fishing line
▷ Beading needle
PROCEDURE
▷ String 3sb and 1cb seven times and interlock with the last sb to form a circle
▷ String 3sb, 1cb and 3 sb, then skip 1cb and insert into the next cb after it
▷ Continue till you get desired length
▷ Put bead cap and finish up
18. BULGE SPIRAL 2
MATERIALS NEEDED:
▷ Crystal bead size 4
▷ Bulge bead
▷ 0.35 fishing line
▷ Beading needle
▷ Coned shape bead
PROCEDURE
▷ Cut fishing line
▷ On right side, string 1cb, 2bb, 1cb, 2bb then cross with the last 2bb inserted
▷ On right side, insert 1cb, 2bb and cross with the last inserted bb
▷ Continue the previous step until you get 10bb
▷ String 1cb on right side and cross with the first bb started with
▷ String 1cb and cross with it
▷ At the left side, string 2bb, 1cb and cross with 2 bb
▷ Pass right side fl into the next cb and string 1cb, 2bb on left and cross with 2 bb
▷ Continue previous step until you have 9bb
▷ Pass fishing line into the next cb and the first 2cb started work with
▷ String I cb on left side and cross at it
▷ Continue till desired length
PHASE 2
▷ Cut a new fishing line
▷ String 10 cone bead and place in the middle of each set
▷ Tie and cut off
▷ Repeat the same stage 2 of each set before going to the next stage
19. MODIFIED SPIRAL ROPE
MATERIALS NEEDED:
▷ Size 3 sand bead
▷ Beading needle
▷ Crystal bead size 6
▷ 0.30 fishing line
PROCEDURE
▷ Cut a comfortable length of fishing line and insert a stop bead
▷ Pick up 6sb, 1cb and 2sb
▷ Stitch needle up through the first 4sb and pull snugly
▷ Pick up 3sb, 1cb and 2sb
▷ Stitch through the existing 3 sb and the new sb inserted and pull
▷ Repeat till you have desired length.
20. MATTING NECK PIECE
MATERIALS NEEDED:
▷ Crystal bead size 6
▷ Sand bead size 2
▷ 0.35 fishing line
▷ Beading needle
PROCEDURE
▷ 1 cb, clasp, 1 cb then cross with 1sb
▷ I cb on both sides then cross with 1cb
▷ 1cn on both sides and cross with a sb
▷ Follow patter till you get desired length
PHASE 2
▷ String 5sb, 1cb, 5sb then pass fl through the cb used in interlocking previous step
▷ Repeat previous step till you get the desired width
PHASE 3
▷ (netting step) pick 2 sb, 1cb, 2sb and insert needle into crystal in the upper part
▷ Continue netting pattern to get design
17. TUBIC DESIGN
MATERIALS NEEDED:
▷ Size 2 sand bead
▷ Crystal bead size 4
▷ 0.30 fishing line
▷ Beading needle
PROCEDURE
▷ String 3sb and 1cb seven times and interlock with the last sb to form a circle
▷ String 3sb, 1cb and 3 sb, then skip 1cb and insert into the next cb after it
▷ Continue till you get desired length
▷ Put bead cap and finish up
MATERIALS NEEDED:
1. Size 1 sand bead (sb)
2. Size 6 crystal bead (cb)
3. 0.30mm fishing line (fl)
4. Beading needle
PROCEDURE
▷ Pick 1sb and 1cb three times and form a ring
▷ Exit fl from a sb and pick up1cb and 5sb and stitch through the next sb
▷ Repeat previous step
TO STEP UP
▷ Pick 1cb and 5sb and stitch through the first sb after cb in step 2
▷ Continue till you get desired length.
2. FOUR WAY SPIRAL
MATERIALS NEEDED:
▷ Size 6 crystal bead (cb)
▷ Size 2 sand bead (sb)
▷ 0.35 fishing line (fl)
▷ Beading neddle
PROCEDURE
▷ Cut a comfortable length of FL into four equal sizes
▷ Insert a single stopper at the end of all the four FL
▷ Insert 7SB into each of the FL
▷ Divide the FL into two groups making it two groups
▷ Pick up the first group and cross with 1CB
▷ Repeat previous step for the other group
▷ Pick a line from each of the group and join them side by side to form another group of FL
▷ Pick one group of the FL and Insert 4SB on the FL (left line)
▷ Insert 1CB on the right line and cross the line with 1SB
▷ Repeat two previous steps to the other group
▷ Continue to get desired length
▷ To round up repeat step 3 and insert stopper and hook
3. FLOWER ON SPIRAL ROPE
▷ Insert needle into previous spiral work and pick 4sb, 1cb6 and 1sb
▷ Skip the last sb and pass needle under the cb6, 4sb and back into the previous spiral rope beads
▷ Then pass needle into the next sb on the spiral rope
4. LEAFY DESIGN
MATERIALS NEEDED:
▷ Crystal bead size 6&8 (CB6&CB8)
▷ Size 50 fishing line (FL)
PROCEDURE
▷ Insert 2CB8 and 2CB6 on the right, 2CB6 on the left and interlock with 2CB8
▷ Put 2CB6 on the left, another 2 on the right then interlock with 2CB8
▷ Continue until you get desired length
TO TURN:
▷ Insert 2CB6 and 2CB8 on your left, cross with 2CB6
▷ Insert 2CB8 and 2CB6 on the left FL then cross with 2CB8
▷ Pass the right FL into the previous 2CB6 by the side and insert 2CB6 on the left FL and cross with 2CB8
▷ Continue previous step till you get till the end and turn again (3 steps)
5. BRIDE BRACELET
MATERIALS NEEDED
▷ Size 2 sand bead (sb)
▷ Crystal bead size 8(CB8)
PROCEDURE
▷ Insert hook and stopper to FL after dividing into 2sides (left and right)
▷ Insert 10SB to each sides and cross both side with 1CB
▷ Insert 10SB to each sides and insert 2SB
▷ Insert 10SB and cross with 1CB
▷ Repeat 2-3 to get desired length
6. BEADED ROSE
MATERIALS NEEDED
▷ Crystal bead size6(cb)
▷ Size 2 sand beads (sb)
▷ 0.40Fishingline
▷ Beading needle
PROCEDURE
▷ Insert 8cb and tie to form a ring
▷ Pass needle into immediate bead after knot and insert 1sb, 1cb, 3sb, 1cb and 1sb into that same crystal you passed your needle into
▷ Insert8sb and pass needle into the 3sb in the previous step
▷ Pass another 8sb and pass needle into the bead in step 2
▷ Pass needle into the next crystal and repeat step 3-4
7. FLAT SPIRAL
MATERIALS NEEDED:
▷ 0.35 fishing line
▷ Crystal bead size 4 and 6
▷ Size 2 sand bead
▷ Beading needle
PROCEDURE
▷ Pick up 2cb6, 7sb, 1cb4 and 7sb and sew back through the 2size6 in the same direction. Push the loop of the sb and cb4 to the right of the two cb6
▷ Pick 7sb, 1cb4 and 7sb and sew through the last cb6 and push to the left of the 2cb6
▷ Pick up 1cb6, 7sb, 1cb4 and 7sb and sew through the last next cb6 in the previous step and the new one just added and push new loop to the right
▷ Repeat procedure to get desired length.
8. 30 BEADED BALL PROCEDURES
(Any size of bead. 0.40 or 0.50 fishing line)
PROCEDURE
NOTE: pass with right hand and pick beads with left
▷ Pick 4 and cross with 1
▷ Pick 3 and cross with 1 and pass fl to the next bead
▷ Pick 2 and cross with 1 and pass into next bead
▷ Pick 2 and cross with 1 and pass into next bead
▷ Pick 2 and cross with 1 and pass into next bead
▷ Pick 1 and cross with 1 and pass to the next bead
▷ Pick 2 and cross with 1 and pass into next 2 beads
▷ Pick 1 and cross with 1 and pass into next 2 beads
▷ Pick 1 and cross with 1 and pass into next 2 beads
▷ Pick 1 and cross with 1 and pass into next 3 beads
▷ Cross both lines with 1 beads and tie
9. PICOT CORN
MATERIALS NEEDED:
▷ 0.35 fishingline
▷ Size 2 sand bead
▷ Crystal bead size 6
▷ Beading needle
PROCEDURE
▷ Insert 6sb and tie to form a ring and enter into the sb next to the knot
▷ Pick a sb and skip the next sb to the one you entered on the ring and enter the next sb
▷ Repeat previous step until you get the desired length e.g 18inches
▷ (to close) move the needle round the sb at the top of a couple of times to close the circle
▷ Insert the needle into the sb on the next line to the left
▷ Pick 5sb and enter the sb up on the next line
▷ Repeat previous step for the quarter of the work
▷ To continue, follow the same movement but pick a crystal bead and a sb, insert the needle back into the cb then climb
▷ Repeat previous step for half of the entire length and repeat previous method to finish the remaining quarter.
10. FLATRON DESIGN
MATERIAL NEEDED:
▷ 0.35 fishing line
▷ Beading needle
▷ Crystal bead size 8
▷ Sand bead size 2
PROCEDURE
▷ Cut a long fl and string 4sb on the left side, 1 cb on the right and cross with 1 sb
▷ String 4sb on the right side and 1cb on the left and cross with 1sb
▷ Continue step 1-2 to get desired length
STAGE 2
▷ Cut a fresh fl, pass the left side fl through the first cb of stage 1
▷ String 4sb on the left side and pass it through the third cb of stage 1
▷ With right hand, string 1 cb and 4sb and cross with 1sb
▷ With left string 4sb and skip the next cb and pass through the next one
▷ With the right side, sting 1cb, 4sb and cross with 1sb
▷ Repeat stage 2 till you get to the end of stage 1
STAGE 3
▷
▷ Cut another fl and repeat stage 2 till you get to the end
▷ Starting like stage 2 but instead of 4sb, it will decrease to 3sb
NOTE: the more step, the lesser he sb will be
11. DOUBLE SPIRAL ROPE
MATERIALS NEEDED:
▷ 0.30 fishing line
▷ Beading needle
▷ Sand bead size 2
▷ Crystal beads size 4
PROCEDURE
▷ On a comfortable beading thread, pick up 4cb4 and 7sb then stitch back through the 4cb4 and pull tightly to make them fall side by side
▷ Pick up 1cb4 and 7sb, stitch up through 3cb4 and the new one added and pull
▷ Continue by picking 1cb4 and 7sb and stitch up through t3cb4 existing and new one added till you get desired length.
12. CRYSTAL SPIRAL 1
MATERIALS NEEDED:
▷ Crystal bead size 6
▷ Sand bead size 6
▷ Beading needle
▷ 0.30fishingline
PROCEDURE
▷ String 1cb, 3sb, 1cb, 3sb and icb and pass fl into the cb to form a ring
▷ String 3sb and 1cb and pass fl into the next cb
▷ Continue inserting 3sb and 1cb to get desired length
NOTE: there will be 2cb beside each other, always pass needle into the first cb
13. FISH BONE
MATERIALS NEEDED:
▷ 0.35 fishing line
▷ Size 2 sand bead
▷ Beading needle
▷ Crystal bead size 4
PROCEDURE
▷ Add stop bead
▷ Drop 6sb and pass fl through the middle 3sb upwardly ( 2 sb fall to the side)
▷ Drop 1sband pass fl from above through the 4sb i.e using the one used as stop bead
▷ Drop 1cb and pass fl through the 2sb on the other side
▷ Now, drop 4sb to make 6sb on the cb and repeat all steps to get desired length
STEP 2
▷ Pick a new fl and tie
▷ Repeat steps 1-3 in step 1
▷ Then pass fl through the first cb on completed step 1 and through the 2 sb on the other side
▷ Drop 4sb and repeat procedure
14. MODIFIED ABUJA CONNECTION
MATERIALS NEEDED:
▷ Size 2 sand bead
▷ Crystal bead size 8
▷ 0.35 fishing line
▷ Beading needle
PROCEDURE
▷ Insert I cb and slide to the middle, add 5sb each to left and right sides and cross with cb
▷ Continue till you get desired length
PHASE2
▷ Cut a new fl and insert it into the first cb added in step 1
▷ Add 5sb to the left fl and add 1cb, 5sb and 1cb to the right fl
▷ Then insert the right fl into the second crystal in step1
NOTE: Continue phase 2 to get desired width, you will continue by adding 1 bead to new step just like the conventional design.
15. BUSH DESIGN
MATERIAL NEEDED:
▷ Size 2 sand bead
▷ Beading needle
▷ 0.35 fishing line
▷ Gold ball accessory
PROCEDURE
▷ Cut 6 pieces of fl and add stopper at the tip
▷ Pick 1 out of the fishing lines
▷ Insert 7sb and pass the fl back into the first sb
▷ Insert another 7sb and pass through the first sb again
▷ Continue the procedure 10times
▷ Repeat the same for the other fishing lines.
▷ Insert a gold ball
▷ Start procedure again
▷ Continue till you get desired length.
16. BRIDAL CODE
MATERIAL NEEDED:
▷ Crystal size 6
▷ Size 2 sand bead
▷ 0.35 fishing line
PROCEDURE
▷ Pick 1cb, 2sb, 1cb and 4sb, then pass fl through the third sb
▷ Pull and pick 2sb, 1 cb, 2 sb and pass needle through initial cb and tie
▷ Pick 4sb, go through the third sb and pick 2 sb, 1cb, 2sb and pass fl through the third cb in step 1
▷ Pick 4sb, go through the third sb, pick 2sb, 1 cb
▷ Continue till you get desired length
PHASE 2
▷ From 4sb, pass fl into the bottom of first cb at the top of the work
▷ Bring it out from the top and pick 5sb and go through the bottom of the next cb.
17. TUBIC DESIGN
MATERIALS NEEDED:
▷ Size 2 sand bead
▷ Crystal bead size 4
▷ 0.30 fishing line
▷ Beading needle
PROCEDURE
▷ String 3sb and 1cb seven times and interlock with the last sb to form a circle
▷ String 3sb, 1cb and 3 sb, then skip 1cb and insert into the next cb after it
▷ Continue till you get desired length
▷ Put bead cap and finish up
18. BULGE SPIRAL 2
MATERIALS NEEDED:
▷ Crystal bead size 4
▷ Bulge bead
▷ 0.35 fishing line
▷ Beading needle
▷ Coned shape bead
PROCEDURE
▷ Cut fishing line
▷ On right side, string 1cb, 2bb, 1cb, 2bb then cross with the last 2bb inserted
▷ On right side, insert 1cb, 2bb and cross with the last inserted bb
▷ Continue the previous step until you get 10bb
▷ String 1cb on right side and cross with the first bb started with
▷ String 1cb and cross with it
▷ At the left side, string 2bb, 1cb and cross with 2 bb
▷ Pass right side fl into the next cb and string 1cb, 2bb on left and cross with 2 bb
▷ Continue previous step until you have 9bb
▷ Pass fishing line into the next cb and the first 2cb started work with
▷ String I cb on left side and cross at it
▷ Continue till desired length
PHASE 2
▷ Cut a new fishing line
▷ String 10 cone bead and place in the middle of each set
▷ Tie and cut off
▷ Repeat the same stage 2 of each set before going to the next stage
19. MODIFIED SPIRAL ROPE
MATERIALS NEEDED:
▷ Size 3 sand bead
▷ Beading needle
▷ Crystal bead size 6
▷ 0.30 fishing line
PROCEDURE
▷ Cut a comfortable length of fishing line and insert a stop bead
▷ Pick up 6sb, 1cb and 2sb
▷ Stitch needle up through the first 4sb and pull snugly
▷ Pick up 3sb, 1cb and 2sb
▷ Stitch through the existing 3 sb and the new sb inserted and pull
▷ Repeat till you have desired length.
20. MATTING NECK PIECE
MATERIALS NEEDED:
▷ Crystal bead size 6
▷ Sand bead size 2
▷ 0.35 fishing line
▷ Beading needle
PROCEDURE
▷ 1 cb, clasp, 1 cb then cross with 1sb
▷ I cb on both sides then cross with 1cb
▷ 1cn on both sides and cross with a sb
▷ Follow patter till you get desired length
PHASE 2
▷ String 5sb, 1cb, 5sb then pass fl through the cb used in interlocking previous step
▷ Repeat previous step till you get the desired width
PHASE 3
▷ (netting step) pick 2 sb, 1cb, 2sb and insert needle into crystal in the upper part
▷ Continue netting pattern to get design
17. TUBIC DESIGN
MATERIALS NEEDED:
▷ Size 2 sand bead
▷ Crystal bead size 4
▷ 0.30 fishing line
▷ Beading needle
PROCEDURE
▷ String 3sb and 1cb seven times and interlock with the last sb to form a circle
▷ String 3sb, 1cb and 3 sb, then skip 1cb and insert into the next cb after it
▷ Continue till you get desired length
▷ Put bead cap and finish up
Tuesday, 19 January 2016


Monday, 18 January 2016
FISHBONE SPIRAL
FISHBONE SPIRAL
Materials :
Size 2sb
Size 6cb
0.25 Fl
Procedure:
Put a stopper bead.
Step 1: Pick 6sb, 1cb and 1sb.
Step 2: Skipping the first sandbead from the bottom, Pass your Needle through the next 4sb. This will push to the side 1sb, 1cb and 1sb.
Step 3: Pick 2sb, 1cb and 1sb.
Step 4: Push to the side 1sb, 1cb and 1sb, pass your Needle through the next 4sb from the bottom.
Step 5: Continue repeating step 3 and 4 till desired neck length.
Happy Beading
30 BEADED BALL
30 BEADED BALL
Materials Needed:
30 rounded beads
Fishing Line
Step 1. Put 4beads in fl and cross wt 1.
Step2. Add 3beads to the right fl and cross with 1 bead.
Step3. Pass the left fl into the 1st bead by the left.
Step 4. Add 2 beads to your right fl and cross with 1.
Step 5. Pass the left fl into the 1st a bead by the left.
Step 6. Add 2 beads to your right fl and cross with 1.
Step 7. Pass the left fl into the 1st bead by the left.
Step 8. Add 2 beads to your right fl and cross with 1.
Step 9. Pass the left fl into the 1st and 2nd bead by the left.
Step 10. Add 1 bead to your right fl and cross with 1.
Step 11. Pass the left fl into the 1st bead by the left.
Step 12. Add 2 beads to your right fl and cross with 1.
Step 13. Pass the left fl into the 1st and 2nd bead by the left.
Step 14. Add 1 bead to your right fl and cross with 1.
Step 15. Pass the left fl into the 1st and 2nd bead by the left.
Step 16. Add 1 bead to your right fl and cross with 1.
Step 17. Pass the left fl into the 1st and 2nd bead by the left
Step 18. Add 1 bead to your right fl and cross with 1
Step 19. Pass the left fl into the 1st 2nd abd 3rd beads by the left.
Step 20:. Cross it with last bead and you get your ball.
Pass the remaining fishing lines through the beads to secure it, tie and cut.
30 Beaded Ball
STAR DESIGN
STAR DESIGN
MATERIALS USED :
FL. 30
SB (2)
CB 6 or 8
A NEEDLE
PROCEDURE
STEP 1 : cut a length of FL, thread needle at one end and knot the other side 3times.
STEP 2 : string 1sb, 1cb, 10sb,1cb, 1sb, then pass your needle through the last cb you just picked.
STEP 3: string 10sb, 1cb, 1sb, then pass your needle through the CB u just picked.
STEP 4: keep repeating step 3,and do like 8 rounds.
STEP 5: pass the needle through the Sb from up to down, the next Sb from down to up, do like dat till u go round all the Sb to form a circle shape……..
HAPPY BEADING.
MATTING DESIGN
MATTING DESIGN
Materials needed
Any size of rounded bead
Fishing line
Cut a moderate length of FL
Step 1: Pick 3 beads, push it to the center of your FL so you have a right and left FL. Pick a 4th bead on either FL and cross with it.
Step 2: Pick 1 bead on your right FL, 1 bead on your left FL and another bead on either FL and cross.
Step 3: Repeat step 2 till desired length
To add another layer, cut a new FL. You will notice that the matting has a right side, a middle and a left side. You will be using any of the sides.
Step 4: Pass your FL through the first side bead either on the right or left. Center the FL so that you have a right and left FL.
Step 5: Pick 2 beads on your right FL, 1 bead on your left FL, pick 1 more bead on either of the right or left FL and cross.
Step 6: Pass your left FL to the next side bead.
Step 7: Pick 1 bead on your right FL, 1 on either of the FL and cross.
Step 8: Repeat step 6 and 7 till the end.
Happy Beading.
SPIRAL ROPE
SPIRAL ROPE
Materials :
0.25 or 0.30FL
Sandbeads 2 different colors (bead a and bead b)
Bead a is the inner core bead while bead b is the outer beads.
Procedure:
Cut a long length of FL. Fix your Needle and insert a stop bead. Leave a 5″ tail to be used for the hook.
Step 1: String 4 bead a and 4 bead b.
Step 2: Pass your Needle into the 4 bead a from the bottom (note that you will be working upwards i.e bottom to up)
Step 3: String 1 bead a and 4 bead b.
Step 4: Pass your Needle into the last 4 bead a i.e the 3 from the previous step and the recently added 1 in step 3.
Step 5: Repeat step 3 and 4 till the desired length.
Happy Beading.
Note: You can also substitute the beads with bigger, smaller beads or a mix of both.
To create the fishbone spiral effect, substitute the 4 bead b with 2sb, 1cb, 2sb i.e a total of 5 instead of 4
STAR DESIGN
STAR DESIGN
MATERIALS USED :
FL. 30
SB (2)
CB 6 or 8
A NEEDLE
PROCEDURE
STEP 1 : cut a length of FL, thread needle at one end and knot the other side 3times.
STEP 2 : string 1sb, 1cb, 10sb,1cb, 1sb, then pass your needle through the last cb you just picked.
STEP 3: string 10sb, 1cb, 1sb, then pass your needle through the CB u just picked.
STEP 4: keep repeating step 3,and do like 8 rounds.
STEP 5: pass the needle through the Sb from up to down, the next Sb from down to up, do like dat till u go round all the Sb to form a circle shape……..
HAPPY BEADING
Saturday, 16 January 2016
Materials needed
Fishing line 0.35 and 0.5
Seed bead size 3
Crystal bead size 8 or 10
Procedure
Step 1 matting with 0.35 fishing line
Step 2 You will pass your 0.5 fishing line into the middle matting and pick one size 8 or size 10 crystal then count 1234 seed bead pass your 0.5 fishing line into the no 4 seed bead after that you will pass the fishing line under because is in and out you will repeat the same thing under and pass it up and again and do the same thing.
Note
First layer matting 28 inches
Second layer 31 inches
Third layer 34 inches.
Good luck


SIDE LATERS DESIGN
SIDE LAYERS.
Cut a comfortable length of fishing line(FL) .
STEP 1: String your hook to the center of the FL, join the tips of the FLs, string two crimp beads (stoppers) and flatten with your chain nose pliers.
STEP 2: String 1 crystal bead (cb) into both FLs,
STEP 3: separate it and string 8 sand beads(sbs) on your left fishing line (LFL) and the same on your RFL, then 2cbs on either your LFL or RFL and cross it with the free FL.
STEP 4: Repeat step 3 again but on your RFL, string 5sbs instead of 8sbs.
STEP 5: Do the same thing with 3cbs (twice) in step 4's pattern i.e (8sbs on your LFR, 5sbs on your RFL, 3cbs on either your LFL or RFL.
STEP 6: Do the same thing with 4cbs (twice) but when doing the second one, reduce the sbs on your RFL by one.
NOTE: Now you will start using 8sbs on your LFL and 4sbs on your RFL.
STEP 7: Do 5 to 12cbs (once) when you get to 13cbs, repeat it twice.
STEP 8: Do 14cbs (four times) at this stage you are at the middle of the neck.
So to do the other half of the neck, you will start decreasing the cbs not increasing.
STEP 9: Do 13cbs (twice) again, then 12 to 5cbs (once)
STEP 10: Do 4cbs (twice) but for the second one increase the sbs by one i.e 8sbs on your LFL and 5sbs on your RFL.
Continue repeating like that till you get to 2cbs.
NEXT: String 8sbs on your LFL and 8sbs on your RFL,1cb on both FLs, crimp beads (stoppers), the second part of the hook, then pass your FLs back into the crimp beads, flatten it, pass the remaining FLs back into your


What You Need To Know
Face
Primer
Setting spray
Foundation
Concealer
Setting powder
Brushes
Cheeks
Blush
Bronzer
Highlighter
Eyes
Eye primer
Eyeshadow
Eyeliner
Mascara
Lips
Lip liner
Lipstick brush
Lipstick
Lip gloss
Primer
Setting spray
Foundation
Concealer
Setting powder
Brushes
Cheeks
Blush
Bronzer
Highlighter
Eyes
Eye primer
Eyeshadow
Eyeliner
Mascara
Lips
Lip liner
Lipstick brush
Lipstick
Lip gloss


Subscribe to:
Posts (Atom)